Monday, December 9, 2013
DIY: Friendship Bracelet - Heart
Colorful, cheap, fairly easy to make and highly customizable (DMC floss comes in just about every color one can think of), friendship bracelets are a quick and easy gift. A gift that has some thought behind it, without being over bearing.
I don't know about you, but I never learned how to make them when I was younger. If you are in the same boat as I was, don't worry, they aren't as complicated as they might seem.
The multicolored bracelet in the above picture is a simple chevron pattern. The tutorial that I used was from Honestly WTF.
Below, I have the pattern I made up for the other two bracelets (hard to believe but they are the same, just different tension was used on the knots).
Since I'm new to this whole thing, I won't go through the headache of trying to write up an explanation on what a forward and backward knot are (ever heard of the blind leading the blind, lol), so instead I will direct you again to the Honestly WTF tutorial. The biggest thing I had to keep reminding myself was to DOUBLE knot, so I suppose that is the only advice I have for you.
You will need:
2 Embroidery flosses in the main color you like
1 Embroidery floss in a contrasting color (you can find these at most crafting stores, I found mine at Walmart for 30 cents each)
Scissors
Tape
The bracelet I made used 10 strands of floss. 8 strands will be your main color (MC), 2 strands will be your contrasting color (CC).
Start by cutting 8 strands of MC and 2 strands of CC at 32 inches. The one I made was 24 inches and just a tad too short for my liking, so i would add a few inches if I were you.
Step 1: Knot all strands together, and then part into three sections (since 10 can not be divided evenly by 3, it is okay for your sections to be uneven).
Step 2: Braid for 2 inches, knotting the end so your braid doesn't unravel.
Note: Tape down the braid well so you can really pull on the floss as you go. It might also be helpful to tape the bracelet down as it grows for added stability.
Step 3: Pull out pieces of your floss so that the pattern is, 2 strands main color, 1 strand contrasting, 2 strands main color, and this repeats on the other side.
Between Step 3 and 4: Here is the unseen work of double knotting the main color across for 2 rows.
Step 4: You should now have your contrasting color on the outside edges. To make the border for your heart, take the strand directly next to CC, and double knot backwards for the left side and forward knot for the right side.
Step 5: Work the CC across remaining 3 MC strands.
Continue working 2 rows of MC, the one special row with CC and then 2 more rows of MC, until bracelet reaches desired length.
Once so, knot the end, braid for 2 inches and then knot again. Clip your uneven strands with scissors. You're done! Try your bracelet on or give it to a friend, either way, this cute accessory will brighten your day.
Monday, November 11, 2013
Part II DIY: From Studs to Clip-Ons
In this part II of my "from pierced to clip-ons" twofer, I'll show you how I converted a pair of studs to clips.
Since I made these a few weeks ago they have become my go to for a classy and work appropriate look. I am slightly obsessed with them.
Pearl earrings add so much charm, yet, there is nothing charming about paying $11 dollars for a pair. Since I am so adept at loosing that one earring, I could never justify the cost.
The studs I used for this diy were actually a gift, so I don't know their price. However I have seen similar studs in sets for under $5. Paired with the blanks which run around 25¢ a pair and around 10 minutes, and you can have a thrifty pair for half the price!
Let's get going!
You will need:
1 pair of stud earrings
1 pair of clip on earring blanks
Needle-nose pliers
Hot glue gun (not pictured)
1 - 2. Starting with your clip-on blank, and using the cutters on the needle-nose pliers, carefully trim off the loop. The easiest way I have found to do this is bend the loop to a 90 degree angle and then cut it parallel to arm of the earring.
3. Taking your stud, remove the backings and then using the snips on your pliers, remove the sharps. Try to get the profile as smooth as possible.
4. With your hot glue gun, place a dot of glue on the earring. Since you are trying to hide where the stud was, try dabbing the glue on that spot.
5. Hold to clip-on blank until the glue sufficiently dries (at least 1 minute). Note: if you try to rush this step the glue might not set as well.
6. Further secure the earring to the clip on by adding a string of glue from one side of the earring, over the arm of the clip-on and then to the other side of the earring. This connection will help the earring stay in place.
7. Let the earrings dry completely before messing with them. Wait for the hot glue to go cold (this can take up to 10 minutes).
Finished!
Helpful hints: Though the temptation is strong, please make sure your glue is dry before trying them on for the first time. If the glue isn't completely solid, it might just break right off, taking off the pearl coating with it once you have to start over and take off the now dried glue ... (not speaking from experience here ...) and that wouldn't look as pretty.
Also, though I have gotten away with it, try not to take them off by pulling at the pearl/charm/stud. I like to think of it as if you are pulling electrical cord out of an outlet and pulling it by the cord instead of the plug. It isn't the best idea to pull at the weakest link.
I hope you enjoyed this tutorial and if you are interested in part 1 you can just click the link below.
Part I DIY: From Pierced Dangle Earrings to Clip-ons
Friday, August 30, 2013
Part I DIY: From Pierced Dangle Earrings to Clip-ons
In this quick part one of two tutorial, I will be showing you how to change dangle pierced earrings into clip-ons.
I like the way earrings look, but don't like the idea of having piercings. Clip-ons are the obvious choice, however, I've found them to be hard to find, and fairly expensive at that, especially in comparison to their pierced counter parts.
Yearning to make my own after seeing how easy the process was at a mall kiosk, I searched for the clip-on blanks and finally found them at Micheal's. Fourteen blank pairs for around $3! What more could a girl ask for?
Let's get started!
You will need:
1 pair of clip on blanks (Bead Landing is the brand I found; they come in gold and silver. Mine are silver)
1 pair of earrings you wish to convert
Needle-nose pliers
1 - 2. Using your finger tips, gently pull the charm off of the pierced earring hook. Note: depending on how tightly the charm is attached, you may need to use your pliers.
3. Self explainatory shot of the seperated pieces. (hook and charm)
4. Using your needle-nose pliers, open the ring on one of your clip on blanks.
5. Gently hook the charm onto the open ring.
6. Close the ring with your pliers.
Enjoy!
Sunday, June 9, 2013
FO: Aria's Cowl
Pattern: Bandana Cowl from The Purl Bee
Yarn: Caron Simply Soft in the colorway "Heather Gray"
Mods: Knit using a smaller needle size and smaller gauged yarn for a more close fit cowl
Inspiration: Aria Stark
Purpose: Project 4 of 4 (yay!) for the Game of Thrones KAL on the Ravelry group
Aria is a lot of things. She is head strong, she is fiestey and most of all she is fearless when it comes to her convictions. She is possibly the most kick-a** Stark and one of my favorite characters.
I wanted to make something inspired by her and fell in love with the simple lines of this cowl. I wanted something that looked like Aria would actually wear it and this cowl fit the bill quite nicely. While the shape has a masculine appeal (something tom-boy Aria would probably appreciate), it still has a touch of feminine charm.
I chose the color gray for Winterfell and for the Stark colors; no matter where Aria goes, she always has Winterfell in her heart, so I thought it fitting to pay homage to the fact she might hold onto a little Winterfell gray.
The pattern is well written and easy to follow. I hadn't worked short rows before and this pattern made them a breeze. The cowl worked up very quickly and was easy to knit on while watching tv, but never became boring.
Seeing as the weather where I am has risen to the late 80's, I'm looking forward to wearing this in the Fall ... or maybe it will end up in the gift pile.
Thursday, May 16, 2013
Spring Forward ~ A Free Pattern
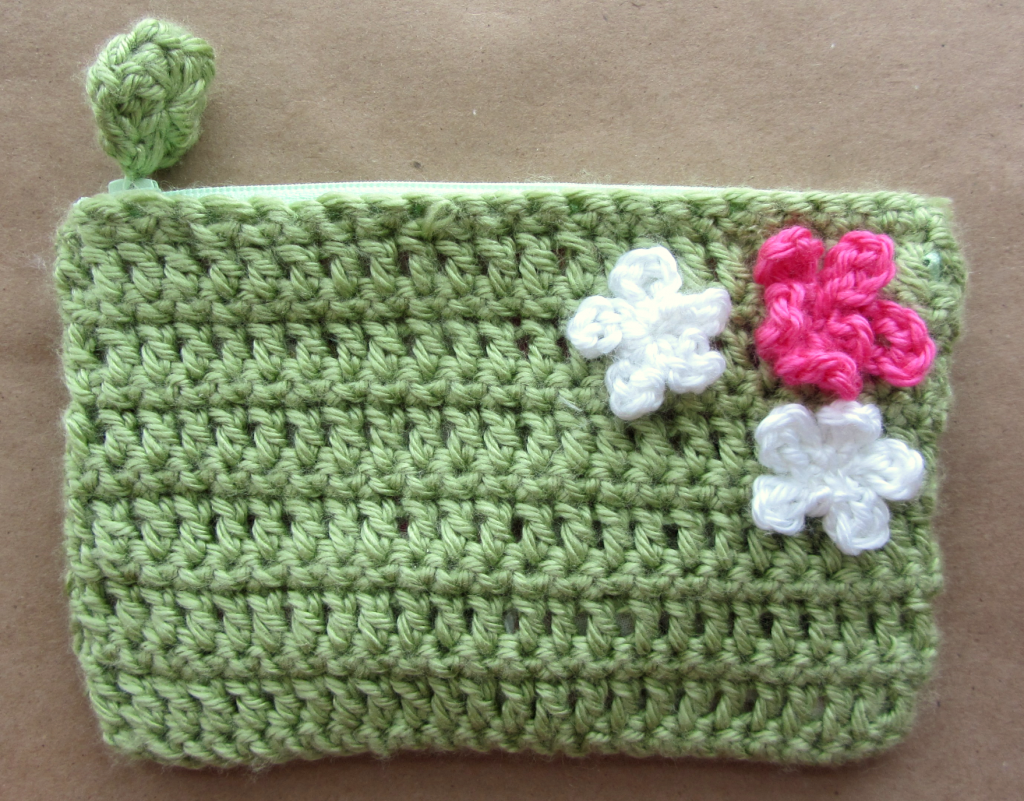
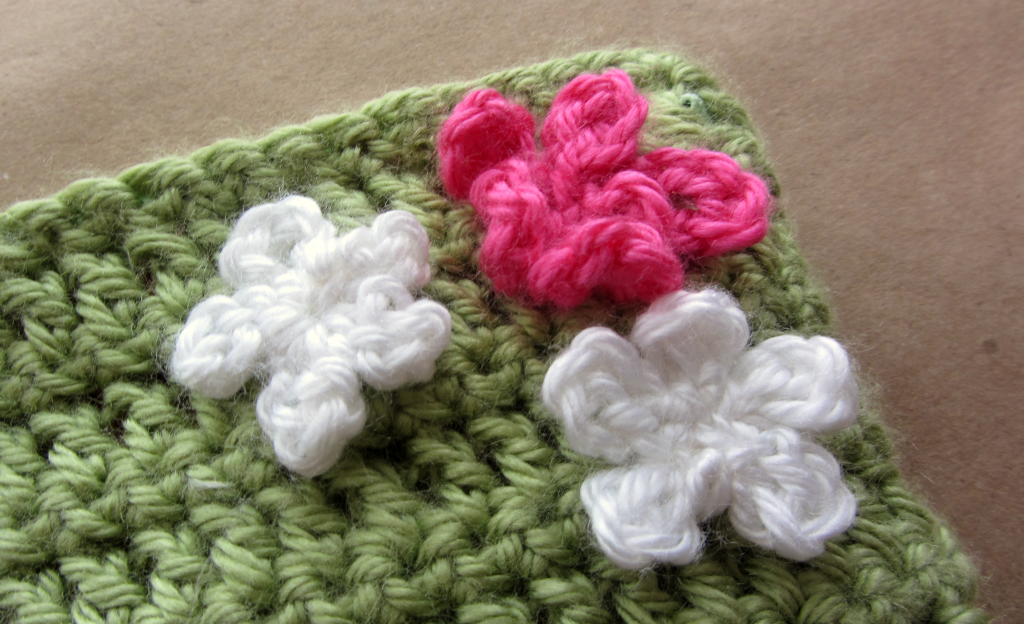
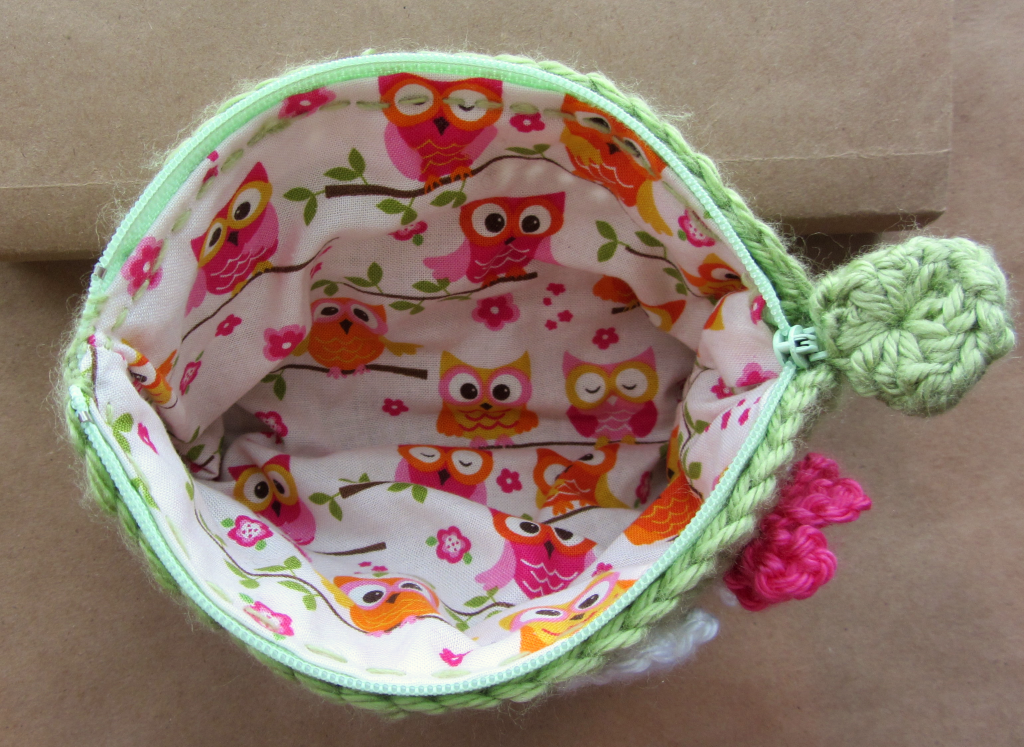
A simple, crocheted, zippered pouch, that uses feminine touches and fabric to make it pop.
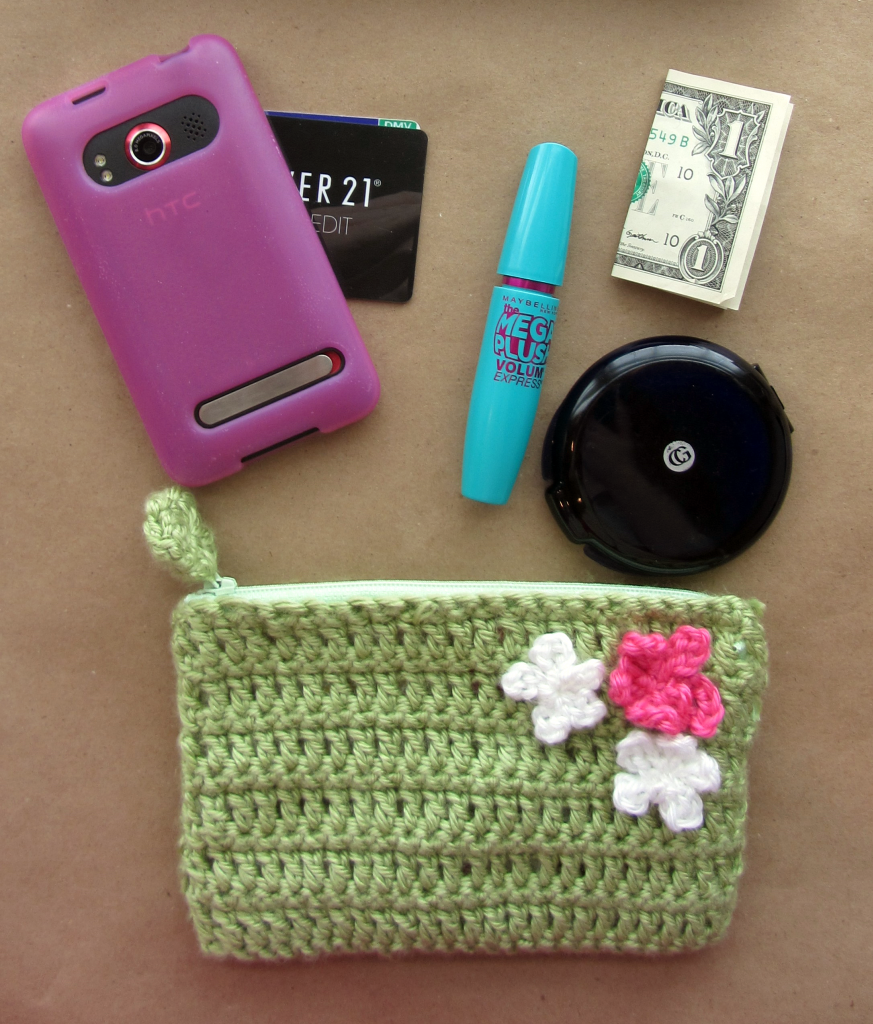
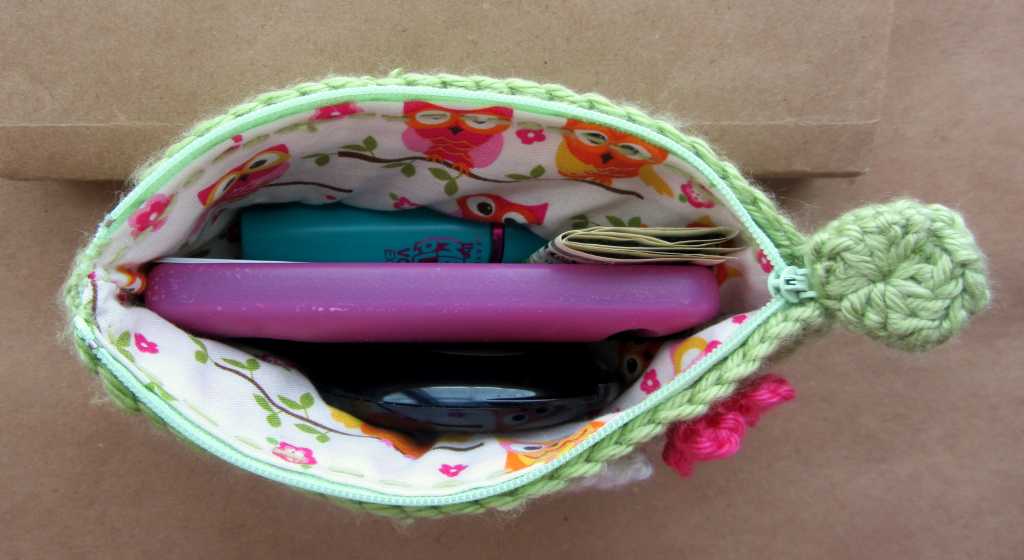
Sunglasses case, cosmetics bag, or just a cute clutch for your necessities; with dimensions of 7 inches x 4.5 inches, you can be sure to fit just what you need.
You will need:
A main color yarn (body)
Two contrasting yarns (flowers)
Hooks: 5.00 mm, 4.00 mm and 3.75 mm
One 7 inch zipper
Fabric (¼ a yard would be plenty)
Sewing needle
Note: The reason I use a 5.00 mm hook for the first row is to compensate for my stitches getting looser the longer I crochet. Since the chain you make impacts how wide the bottom of your piece will be, you can combat it being to narrow by starting with a bigger hook, thus creating a more even shape
Using your main color and size 5.00 mm hook, chain 26
Row 1: Work one row of single crochet (25 sc)
Row 2: Chain 2, turn work and change to size 3.75 mm hook.
Work one row of double crochet (25 dc)
Row 3: Single crochet across (25 sc)
Row 4: Double crochet across (25 dc)
Row 5: Single crochet across (25 sc)
Row 6: Double crochet across (25 dc)
Row 7: Single crochet across (25 sc)
Row 8: Double crochet across (25 dc)
Row 9: Single crochet across (25 sc)
Row 10: Double crochet across (25 dc)
Row 11: Single crochet across (25 sc)
Row 12: Double crochet across (25 dc)
Row 13: Single crochet across (25 sc)
Break yarn and pull through to bind off.
Sew cast on edges and sides together, leaving the bind off
edges as the opening of the pouch.
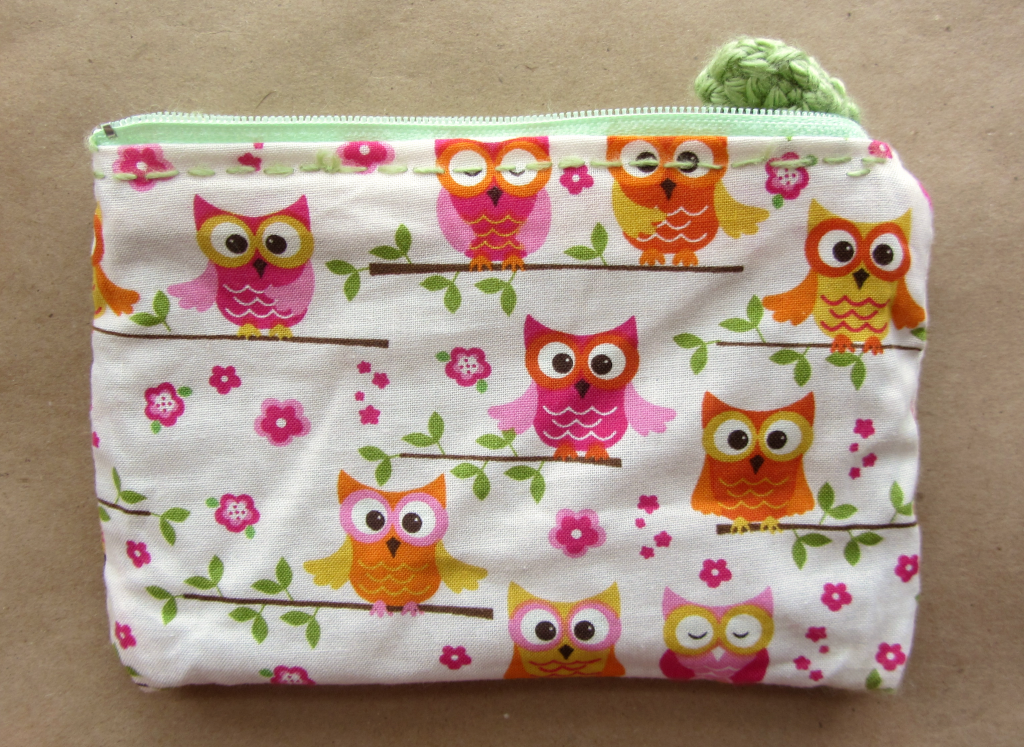
Create your fabric insert by folding your pouch inside out and
using it as a template for the size of fabric you need. Cut one piece and then
sew sides together. Place your crocheted piece into the fabric pouch you’ve
just created.
Then place your zipper between the fabric and crocheted piece. Using the same color you used as the main body, sew zipper into place. Try to make your stitches even and place the zipper straight for best results. Using pins to hold everything in place and together is a useful trick.
Then place your zipper between the fabric and crocheted piece. Using the same color you used as the main body, sew zipper into place. Try to make your stitches even and place the zipper straight for best results. Using pins to hold everything in place and together is a useful trick.
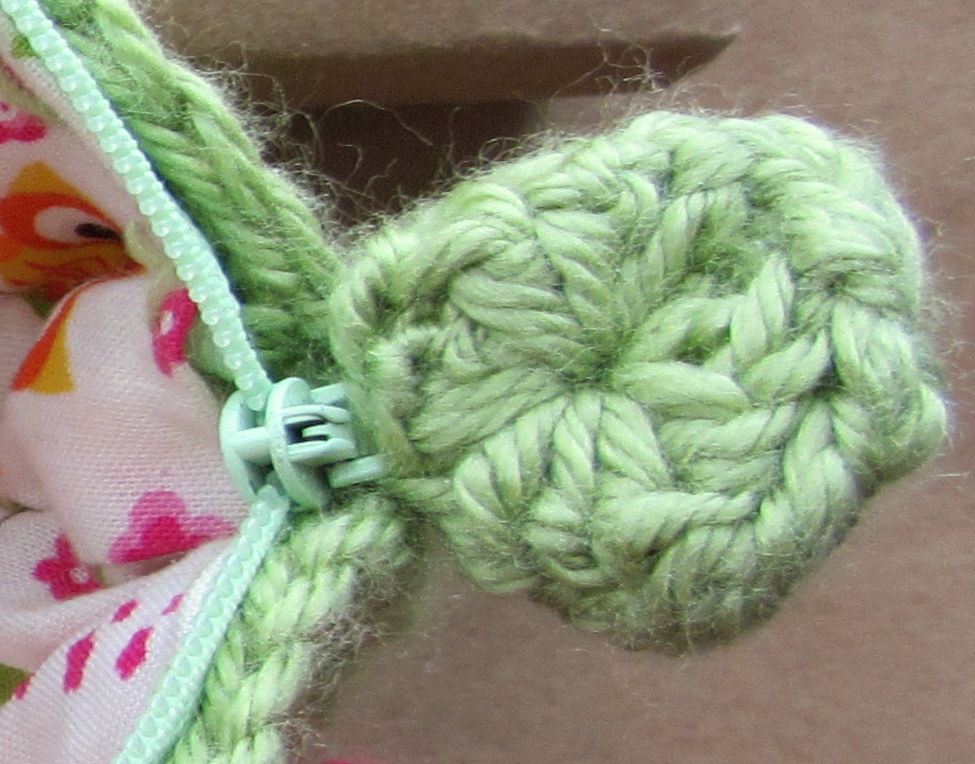 Zipper pull (make two):
With main color, 4.00 mm hook and using the magic loop, double crochet into your loop 10 times. Slip stitch last dc to first dc to create a perfect circle.
After making a second disk, sew together over the pull that
is already on your zipper. To make sure it is secure, you might want to sew
through any holes several times. Also, sew edges of disks together.
Larger flower (make one):
Using one of your contrasting colors and size 4.00 mm hook,
make a magic loop and chain 7. Slip stitch into the magic loop and then chain
another 7, slip stitching that chain into the magic loop as well. Repeat the process
3 more times to create 5 “petals”. Pull yarn through on last slip stitch to
bind off. Use tails to sew flower purse. You can pull your cut ends in between
the crocheted fabric and the cloth.
Smaller flower (make two):
Using one of your contrasting colors and size 4.00 mm hook,
create a magic loop and chain 5, slip stitch into the magic loop and then chain
another 5, slip stitching that chain into the magic loop as well. Repeat the process
3 more times to create 5 “petals”. Pull yarn through on last slip stitch to
bind off. Use tails to sew flowers to purse. You can pull your cut ends in
between the crocheted fabric and the cloth.
Tuesday, May 14, 2013
FO: Mother of Dragons
Pattern: Gris de lin by Cailliau Berangere
Yarn: Caron Simply Soft in colorway "Pagoda"
Mods: Knitted 4 repeats instead of 8
Inspiration: Daenerys Targaryen
Purpose: Project 3 of (crossing my fingers) a hopeful 4 for the Game of Thrones KAL
So I've been in a rut of sorts recently. I partially blame the cold I have, which has left me tired and just feeling blah and not in the mood to work on much of anything. Or at least, these are my excuses for a second GoT knit in a row.
Anyway, on to the knit itself. My inspiration for this cowl was Dany Targaryen and for good reason. Dany is straight up fierce, to the highest degree of fierce. The only match to her fire and determination would be her pure and good heart. If anyone has a good claim to the throne, I think Dany just might be the best bet. She has dragons.
This pattern caught my eye, partially because I liked the texture, but also because it reminded me of the dragon eggs gifted to the Khaleesi in season 1.
The pattern worked up nicely and was very well written. Interesting enough to not get boring but not so complicated it left me frustrated. I would love to make it again, but perhaps with a superior yarn.
Saturday, April 20, 2013
FO: As Rich as a Lannister
Pattern: The Age of Brass and Steam by Orange Flower
Yarn: Caron Simply Soft in colorway "Burgundy"
Mods: None
Knit While Watching: "Vikings", "Game of Thrones", "A Mother's Rage" (don't laugh, Lifetime movies normally suck, but this one wasn't half bad),
Purpose: Project 2 of hopefully 4 for the Game of Thrones KAL
The inspiration for this piece was Tyrion Lannister. He has earned the right as my favorite character for several reasons, a few being: his quick-wit, always interesting dialogues, surprising nobility and kindness, and overall just the fact he kicks a**. Not to mention Peter Dinklage's perfect portrayal and you have a recipe for greatness.
I choose the color burgundy because it reminded me of wine, and that has to be Tyrion's favorite beverage.
As for the photos: The gold coins are supposed to represent the Lannister gold and the gold knights helmet Jamie (Tyrion's brother, for those who don't know) which seemed fitting to me because I do think Jamie and Tyrion, honestly care for each other.
Friday, April 12, 2013
Ahoy Matey! ~ The Pirate
When I think of pirates, I think of the romanticized versions of them. Adventure, sailing the world and daring sword fights, these are what I imagine when I imagine a pirate.
In the movies and books, being a pirate is more than just the biggest adventure you'll ever take; its also the most dangerous, adrenaline laden and fun you'll have either. Who didn't want to be a pirate when they were a kid?
Being a pirate is the most exciting challenge you can take and knitting up this pirate toy sure felt like that just that, a challenge.
Two years ago, I set out to make a pirate doll for my sister's birthday; except, I couldn't seem to find a pattern that fit what I wanted. So I set out on a challenge of creating my own.
 Two weeks later, The Pirate in the picture to the left was "born".
 You might be wondering why there are two dolls, and the answer to that is: writing the pattern (which I'm almost done with and preparing for test knitters).
You see, when I came up with this knitted toy, my notes were, well to put it lightly, lacking.
I find that when I get inspired to make something, there is very little that stops me from going on a working binge of sorts. I'll become consumed by the project, it will be all I think about and work on, until it gets done. In doing so, I find taking notes to be a hindrance (even if I want to take notes); I get so caught up with creating the project, I just forget to or plan to do it later (procrastinator here).
It's interesting to see how much my techniques have changed over the last two years. How things are just a little more polished, a little more tailored. I still think The Pirate I, has his strong points, like personality, and his hair jewelry is a bit better, but Pirate II looks more realistic.
If you can't tell, I went kind of crazy with the photo shoot, hehe. Who knew I had so much "pirate" stuff laying around?
Tuesday, April 2, 2013
FO: Winterfell
Pattern: Winterfell Cowl (Game of Thrones) by Fancy Tiger Knits
Yarn: Caron Simply Soft in colorway "Heather Gray"
Mods: Used needle size of 8 instead of 10, also I knitted 15 pattern repeats instead of 12
Knit While Watching (in order): "Vikings", "Game of Thrones", "Red Widow", "Dallas" and "Bates Motel"
I set out to make this for a "Games of Thrones" KAL started in the Ravelry group called the Season 3 KAL: The KnitGuard. Lots of gorgeous patterns have been chosen, I'm so excited to see what others knit up. It's all sure to be, some beautiful work and FO's.
Winterfell Cowl is a, truly lovely and simple pattern. Good tv knitting (because you don't have to look down), even though it was simple, I still found it hard to work on during my favorite shows.
Alas, Winter is not coming in my neck of the woods, in fact Summer is coming, and Summers are humid, sticky and hot, so I don't know how much use I'll get out of this sweet cowl except for the more chilly Spring nights that might pop up ever so often in the coming months.
So excited to get something done for the KAL. My biggest hope would be to complete the maximum 4 projects and earn all the badges, though coming up with GoT themed knits is surprisingly more difficult than one would think.
Tuesday, March 19, 2013
Pretty in Pink
Femininity, being dainty and sweet not only in spirit but in dress and attitude, these are things I have aspired to be for as long as I can remember. So when I set out to make a card for a girly girl, I knew purses, shoes, and polka-dots bathed in pink was the way to go.
I wanted the card to be simple, soft and not overly crowded, so I stuck to the basics.
I actually drew and cut out the shoe and purse, then embellished the set with ribbon and some scalloped paper bits. Since I didn't have black paper, I used a Sharpie instead to blackout the white paper and trace in the shoe. (that's why it looks a tad 'steaky')
Trying to be professional I even added my "label" to the back. My handwriting is by no means great, but hey, at least it got the job done.
It ended up being a fairly heavy card, so I hope the stamp I put on it, carries it to its destination.
Of course, at this moment, I realize that I forgot to date it ... oh well. I suppose if I were to forget something, I'd rather it be the date than say, a signature.
Thursday, March 14, 2013
FO: Owl Cable Knit Gloves
Okay, so I swear I'm not obsessed with owls ... though my recent projects might suggest otherwise (a card and now gloves all within a few months).
I knit these up pretty fast a few weeks ago, using a pattern I came up with last year. I had another pair, but gave them away as a gift.
I wanted a glove that was a tight fit, but also comfortable and after playing around a bit with different needle sizes I ended up with these.
I accomplished making the wrist snug by using a #2 needle and then switching to a #8 to create a more loose fabric for the palm. Another plus to doing it this way is that I negated the increases, thus making it a super easy pattern to follow.
I actually came up with these before I realized there was an already a very similar pattern on Ravelry (this pattern right here). The similarity is almost striking, and completely unintentional. Interestingly, I was thinking about writing my technique + pattern and offering as a free pattern, but alas, I'm thinking mine is still too similar to warrant its own pattern.
Oh well ... there are a few more patterns I think would be viable canidates for pattern writing. Hopefully soon.
Subscribe to:
Posts (Atom)


